
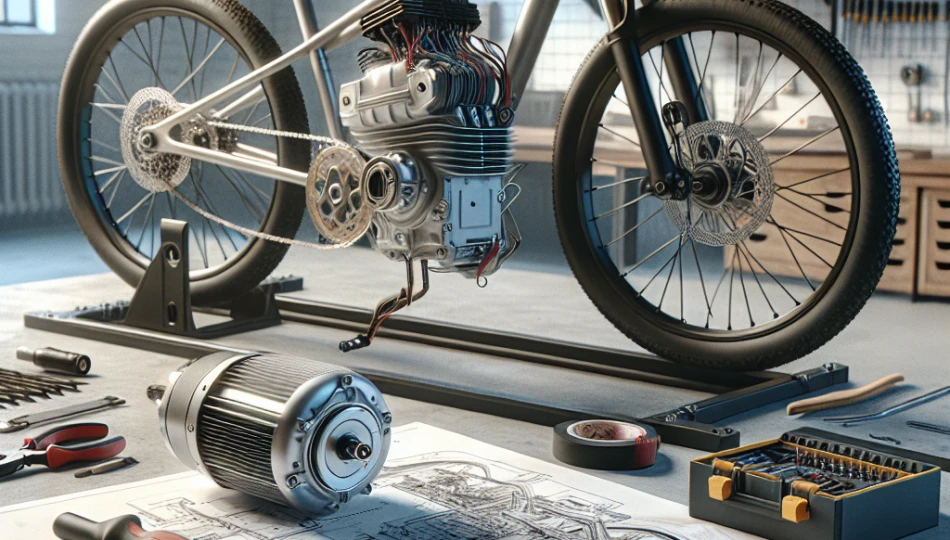
Are you ready to enhance your electric bike’s performance? Installing a new motor can significantly improve speed, efficiency, and overall riding experience. Whether your current motor is underperforming or you’re looking to boost your bike’s capabilities, understanding how to do this installation yourself can save you money and provide a satisfying DIY experience. But how do you install a new motor on an electric bike? The answer is straightforward: by following a systematic approach that involves careful planning and execution.
1. Gather Necessary Tools and Materials
Before diving into the installation process, you must first gather all the necessary tools and materials. Having everything prepared at the start will streamline the process and prevent any interruptions. Here’s what you should collect:
- New electric bike motor
- Motor controller
- Wrench set
- Screwdrivers (Philips and flathead)
- Pliers
- Multimeter (for checking electrical connections)
- Safety glasses and gloves
Additionally, make sure to have a clean workspace. Depending on the type of motor you’re installing (hub motor vs. mid-drive), you may need other specific tools. For instance:
- If installing a hub motor, a torque wrench may be necessary.
- For mid-drive installations, you might need a crank puller.
Preparation optimizes your workflow and ensures you won’t have to hunt for tools mid-project, which can lead to frustration.
2. Remove the Old Motor
Once you have all the tools ready, the next step is to remove the old motor. This process can vary depending on whether you’re replacing a hub motor or a mid-drive motor, but generally, the steps are similar:
- Disconnect the battery (safety first).
- Remove any screws or bolts that secure the motor to the bike frame.
- Carefully detach the motor from its housing.
When removing the old motor, it’s important to be cautious about the wires and connections. If you have a hub motor, you’ll need to pull the wheel out from the frame, which may require some finesse. On the other hand, mid-drive motor installations involve detaching the motor from the crankset, which can sometimes be tricky due to tight spaces. Always refer to the manufacturer’s guide for specific instructions on your bike model.
Once the old motor is removed, inspect the mounting area for any signs of wear or damage. It’s best to fix any issues before installing the new motor to ensure it fits properly.
3. Prepare the New Motor for Installation
With the old motor out of the way, it’s time to prepare your new motor for installation. Many new motors come with additional components like a motor controller and wiring harness, which need to be integrated into the bike’s electrical system:
- Check the manufacturer’s instructions carefully.
- Assemble the motor controller if it’s not pre-assembled.
- Connect any required wiring for the motor to function correctly.
This step is critical because the connections you make now will affect the performance of your bike. Ensuring that all connections are secure and correctly positioned can help prevent electrical faults later.
Take the time to familiarize yourself with the wiring by referencing diagrams that usually come with the motor. It’s beneficial to mark wiring connections before detaching anything during the removal process, as this can prevent confusion when connecting the new motor.
4. Install the New Motor
Now comes the exciting part: installing the new motor! Follow these steps to ensure everything is done correctly:
- Position the new motor in the designated area.
- Align the motor with the mounting points on the bike.
- Secure it with screws and bolts, ensuring everything is tightened to the manufacturer’s specifications.
When installing a hub motor, make sure the wheel is properly seated in the dropouts and that it spins freely without any obstructions. If you are installing a mid-drive motor, pay close attention to hidden areas, as it may require you to install the motor in specific orientations to avoid rubbing against other bike components.
After securing the motor, inspect the surrounding area and clearance. A well-installed motor should have no undue friction with the bike’s structure, and it should feel solid to the touch without any wobble or movement when you apply force.
5. Connect the Wiring
Connecting the wiring is perhaps the most critical aspect of installing a new motor on your electric bike. A poor connection can lead to performance issues, such as weak acceleration or intermittent motor function. Follow these guidelines:
- Identify and match each wire according to the wiring diagram provided in the motor’s manual.
- Use connectors that are compatible with your bike’s electrical system.
- Secure connections with heat shrink tubing or electrical tape to protect from water and dirt.
As you connect the wires, it’s essential to double-check each connection for solid contact. If you’re unsure, use a multimeter to verify continuity before reintegrating the battery. Different models may have specific wiring colors or patterns, so take your time to ensure accuracy.
Consider using a color-coded system or labeling connections during disassembly for more accessible reference. This practice will help you avoid mistakes and save time throughout the installation process.
6. Reinstall the Battery
After connecting all the wiring, it’s time to reinstall the battery. This step is crucial as it re-establishes power to your electric bicycle. Follow these steps:
- Ensure that the battery is fully charged before connecting it.
- Reconnect the battery and ensure that it locks securely in place.
- Check that there are no loose cables around the battery compartment.
When you connect the battery, listen for any unusual sounds or scents. If you detect anything out of the ordinary, disconnect the battery immediately and recheck your wiring connections. A faulty connection can cause immediate failures or damage to both the motor and battery.
This is also a good time to test any functionality such as battery lights or indicators before heading out to ride. A successful installation will usually mean a green light on your battery indicator, signaling readiness for a test ride.
7. Test the Installation
The final step in the installation process is to conduct a thorough test of your newly installed motor. This vital phase confirms that everything is working as intended:
- Ensure you are in a safe and controlled area for testing.
- Start with a low-speed test to check responsiveness.
- Gradually increase your speed and listen for any unusual sounds or vibrations.
As you ride, pay attention to the feedback from the motor. It should engage smoothly without jerking or lagging. If you experience any issues, do not hesitate to stop and check the connections, mounting, and battery integration.
Regular maintenance checks post-installation are also essential. Periodically review the motor and electrical connections for wear and tear, and ensure everything remains secure and functional. This continued attention will help prolong the life of your new motor and enhance your overall riding experience.
Understanding Different Motor Types
Before deciding which motor to install on your electric bike, it’s essential to understand the two main types available: hub motors and mid-drive motors. Each type has its pros and cons, and the choice can significantly impact your riding experience.
Hub Motors
Hub motors are located in either the front or rear wheel hub and provide direct power to the wheel. This design offers a straightforward installation process and is usually less complex than mid-drive motors. Hub motors are known for their simplicity and are often favored for city commuting and casual riding.
One of the major advantages of hub motors is that they require less maintenance. Since they do not affect the bike’s chain and gears, they experience less wear and tear, leading to lower overall maintenance needs. However, they might not offer the same power efficiency when climbing hills, given that it can put substantial strain on the bike’s frame.
Mid-Drive Motors
In contrast, mid-drive motors are situated at the bike’s crankset, resulting in improved weight distribution and balance. This position enables the motor to leverage the bike’s gears, allowing it to be more efficient, particularly on steep inclines or off-road conditions. As a result, mid-drive motors are preferred by those who seek high performance and versatility in varied terrains.
However, mid-drive motors may lead to increased wear on the bike’s chain and gears since they engage with these components more deeply during operation. This factor requires occasional maintenance, making them a bit more complex than hub motors. For riders who prioritize performance and plan to tackle diverse environments, mid-drive motors can be well worth the extra care.
Maintenance Tips for Your Electric Bike Motor
Once you’ve successfully installed a new motor on your electric bike, it’s important to adopt a routine maintenance schedule to ensure longevity and optimal performance. Here are some essential tips to help you keep your motor in great condition.
Regular Inspections
A regular inspection of your motor is crucial. Look for any signs of wear and tear, such as loose wires, unusual noises, or any visual damage to the motor casing or connections. Pay attention to the screws and bolts and make sure they remain tightly fastened, as vibrations during riding can loosen them over time.
Additionally, inspect the electrical connections. Corrosion or dirt can hinder performance and cause connection issues. If you notice any wear on the wiring insulation or connectors, consider replacing them promptly to prevent electrical failures.
Cleaning and Lubrication
Keeping your motor clean is essential for longevity. Dirt and grime can accumulate both on the motor exterior and in its mechanical parts, leading to overheating or performance issues. Use a soft brush and a damp cloth to remove any debris or dirt, taking care not to let water penetrate the motor housing.
If your motor has moving components accessible for cleaning, lubricate them according to the manufacturer’s recommendations. Proper lubrication minimizes friction and enhances performance. However, be careful not to over-lubricate, as this can attract more dirt and create further issues.
Frequently Asked Questions
What are the signs of a failing electric bike motor?
Noticing a decline in performance is often the first sign of a failing electric bike motor. Riders may experience issues such as reduced speed, loss of power, or strange noises when the motor is engaged. Additionally, if the bike struggles to climb even mild slopes or exhibits jerking motions while accelerating, these could be indicators of a malfunctioning motor. It’s essential to inspect the motor and wiring periodically and address any issues immediately to avoid costly repairs or replacements.
How can I enhance my electric bike’s battery life?
The battery is one of the most vital components of an electric bike, and maintaining it can significantly enhance its lifespan. Start by avoiding full discharges; instead, recharge when the battery reaches about 20-30% capacity. Using a smart charger that matches your battery specifications can also improve battery life by preventing overcharging. Lastly, store your battery in a cool, dry place, and avoid exposing it to extreme temperatures, which can degrade its performance over time.
Can I install a more powerful motor on my electric bike?
While upgrading to a more powerful motor can substantially enhance speed and performance, it’s imperative to ensure your bike’s frame and other components can handle the increased power. Check the manufacturer’s recommendations for compatibility, as a significant wattage increase may require a compatible battery, motor controller, and upgrades to other bike components, such as the brake system and drivetrain. Be mindful that using a motor that exceeds regulatory limits may lead to legal ramifications, depending on your local cycling laws.
What tools do I need for basic maintenance of my electric bike motor?
Basic maintenance for your electric bike motor requires some fundamental tools. A basic toolkit should include various screwdrivers, a wrench set for tightening bolts and screws, pliers, and a multimeter for checking electrical connections. Additional tools like a torque wrench may be necessary for hub motor installations. Having these tools readily available will allow for easier maintenance and troubleshooting tasks, ensuring you can effectively manage any potential issues that arise.
How do I determine the right motor size for my bike?
The right motor size for your bike largely depends on your intended use. For city riding and commuting, a motor ranging from 250W to 500W is typically sufficient. If you plan to tackle more challenging terrains or steeper hills, you may prefer a motor with 750W or more. Consider also your bike’s weight, your riding style, and the terrain in your area when selecting the right motor. Always refer to the manufacturer’s specifications and guidelines when making your selection.
Is it worth upgrading my existing electric bike motor?
Whether it’s worth upgrading your motor depends on several factors. If your current motor struggles with power, battery life, or functionality, an upgrade can provide a significant boost in performance. Additionally, newer motors often feature improved technology that can enhance efficiencies, such as regenerative braking or lighter designs. However, consider compatibility with your existing bike components and whether the cost of the upgrade aligns with your intended riding experience and frequency.
Summing It Up
Installing a new motor on your electric bike can be a rewarding enhancement to your riding experience, opening up new levels of performance and efficiency. By following the seven foundational steps outlined, from gathering tools to testing your installation, you can ensure that the job is done correctly. Understanding the differences between hub and mid-drive motors equips you with the insights needed to make an informed decision based on your riding preferences.
Moreover, maintaining your electric bike as well as the motor is vital for sustaining performance over time. Implementing regular inspections, cleaning routines, and understanding common issues can help you extend the lifespan of both the motor and battery. Whether you’re a casual commuter or a devoted adventurer, investing time in the right installation and maintenance practices will certainly pay off in your electric biking journey.