
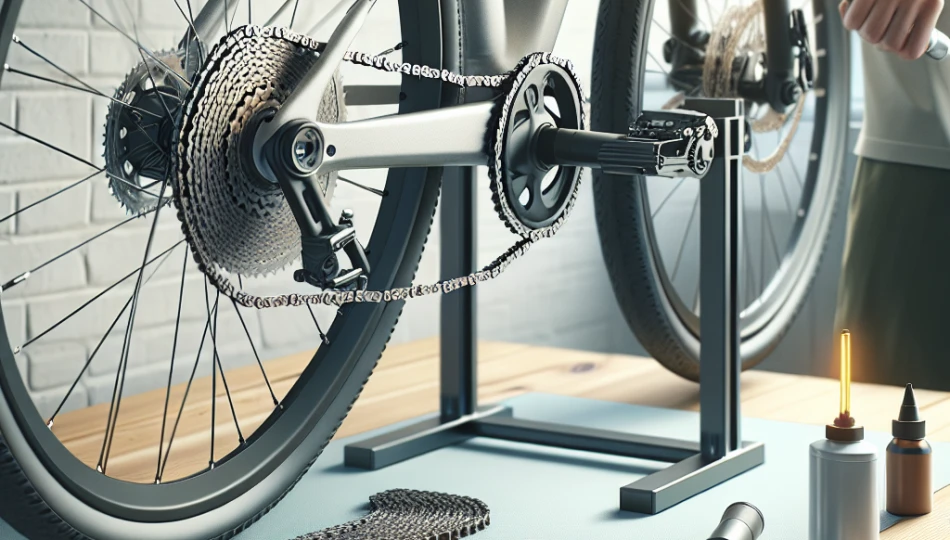
As electric bikes continue to gain popularity, many riders are looking for ways to maintain their bikes without having to rely on professional services. One common maintenance task is changing the bike chain, a process that can seem daunting to the untrained eye. In this article, we will answer the question: Can you change an electric bike chain yourself? Yes, you absolutely can. With the right tools and guidance, changing an electric bike chain can be a straightforward task that can save you time and money.
1. Gather the Essential Tools
Before embarking on this DIY project, the first step is to gather the necessary tools. Having the right equipment at hand will make the process smoother and more efficient.
- Chain breaker tool: This tool allows you to push the pins out of the chain links, making it easier to remove or attach the chain.
- New chain: Ensure that the new chain is compatible with your electric bike model. Factors such as the number of speeds (gears) matter.
- Bike lubricant: A good quality bike chain lubricant will help keep your new chain functioning smoothly.
- Rags: Keep rags handy for cleaning the components as you work.
- Adjustable wrench or pliers: Sometimes, you may need these to help with various components.
With these tools gathered, you are well on your way to successfully changing your electric bike chain. Having the right tools not only lowers the risk of damage but also speeds up the overall process.
2. Understand Your Chain’s Compatibility
Before purchasing a new chain, ensure you understand your bike’s requirements. Compatibility is crucial for efficient performance and longevity.
- Check the speed: Electric bikes typically come with different speeds (e.g., 7, 9, 11). Check your current chain to identify how many speeds it supports.
- Determine the length: Use a measuring tape or a ruler to determine the appropriate length for your new chain. It’s recommended to compare the new chain with the old one to ensure proper sizing.
- Look for similar manufacturer specifications: If you can, buy chains that are specifically meant for your bike brand to avoid compatibility issues.
Understanding these factors will help you choose the correct chain, meaning a smoother installation and better performance on your e-bike. A poorly fitted chain can lead to unnecessary stress on your bike’s components and may lead to premature wear and tear.
3. Prepare Your Bike
Properly preparing your bike before starting the chain replacement process is essential for a successful outcome. This stage sets the foundation for ease of access and reduces the chance of errors.
- Place your bike on a level surface: A stable environment is crucial for safe work and accuracy.
- Shift to the smallest gear: This makes the chain slack and easier to manage.
- Using a bike stand: If you have one, securing your bike on a stand can make it easier to work on.
Taking the time to prepare your bike can significantly streamline the process of changing the chain. A well-prepared setup reduces frustration, allowing you to focus on the task at hand.
4. Remove the Old Chain
Now comes the part where you’ll remove the old chain. This step requires some attention to detail to avoid damaging your bike’s components.
- Use the chain breaker tool: Position the tool on the pin of one link and gently push the pin out until it’s free. Take care not to push it out completely to avoid losing it.
- Remove the chain from derailleur and cassette: Carefully slide the chain off the derailleur and cassette system. This process may require some finagling to get it around the gears.
- Check for damage: As you remove the chain, inspect it for wear or damage in the other components like the cassette and chainring. This can save you from later problems.
Removing the old chain is a critical step, and careful execution will ease the way when it comes time to put on the new chain. A poorly removed chain can lead to further complications down the road.
5. Clean the Components
Once the chain is removed, take this opportunity to clean the components around it. A clean working area helps ensure that your new chain operates smoothly.
- Wipe the cassette and chainring: Use a rag to remove dirt, grime, and old lubricant.
- Inspect for damage: Again, check for wear on both the cassette and chainring. This maintenance step is key to prolonging the life of your components.
- Apply lubricant: After cleaning, apply a light coat of bike lubricant to the cassette and chainring to prepare them for the new chain.
Maintaining a clean chain line is vital for the performance of your e-bike. A neglected drivetrain can lead to unnecessary friction, which not only affects speed but can also shorten the life of your components.
6. Install the New Chain
With everything prepped, it’s time to install the new chain. This vital stage is crucial for ensuring that everything functions correctly once the installation is complete.
- Thread the chain through the derailleur: Begin by positioning the new chain through the derailleur first, ensuring you have it on the right side according to the gear setup.
- Connect the ends: Use the chain breaker tool again to connect the two ends. Make sure the links are properly engaged to allow for smooth transitions.
- Check alignment: As you install the chain, double-check its alignment on the gear to avoid any rubbing or misalignment.
The installation process is often the most critical step, as a well-installed chain ensures efficiency and responsiveness in your bike. Investing time here will pay off in performance gains and longevity.
7. Test and Adjust the Chain
The final step before you hit the road is to test and, if necessary, adjust the chain. This step certifies the entire process and guarantees that everything operates smoothly.
- Spin the pedals: Slowly move the pedals to see if the chain runs smoothly through the gear system.
- Check for noise: Listen for any unusual noises which could indicate misalignment.
- Adjust tension if necessary: If the chain seems too loose or tight, use the derailleur adjustments to achieve optimal tension.
Testing your new installation is vital. It allows you to identify and resolve any immediate issues before they can affect your riding experience. Following all these steps will ensure a well-functioning electric bike chain, and it will make your rides smoother and more enjoyable.
Understanding Chain Maintenance for Your Electric Bike
Now that you have changed your chain, it’s essential to understand the ongoing maintenance that will keep it in top condition. Regular maintenance not only enhances the performance of your bike but also prolongs the lifespan of your chain and cycle components. Here are some key practices to consider:
Regular Lubrication
Lubrication is crucial for the smooth operation of your chain. It reduces friction, which in turn minimizes wear and tear on both the chain and the other components of the drivetrain. A well-lubricated chain will operate quietly and efficiently, allowing for smoother gear shifts and improved overall performance. It’s advisable to lubricate your chain every few hundred miles, or more frequently if riding in wet or muddy conditions.
When lubricating, apply a small amount of lubricant to each link while rotating the pedals backward. After allowing the lubricant to penetrate the links for a few minutes, wipe off any excess with a rag. This prevents dirt and grime from accumulating on the chain, which can lead to accelerated wear over time.
Regular Chain Cleaning
In conjunction with lubrication, regular cleaning of your chain is essential. The buildup of grime and dirt can create extra friction, leading to wear on the chain and drivetrain components. Cleaning your chain can involve using a specialized bike chain cleaner or a simple rag along with degreaser to remove hardened grime. Aim to clean your chain thoroughly at least once a month or after rides in particularly muddy or wet conditions.
To clean your chain effectively, simply secure the bike and rotate the pedals backward to expose dirty links. With a brush or cloth dampened with degreaser, clean each link thoroughly. Afterward, rinse your chain with water, dry it, and reapply lubricant to ensure an optimal performance.
Signs of Chain Wear and When to Replace
Understanding when to replace your bike chain is essential to maintaining a healthy drivetrain. Chains do not last indefinitely, and continued use of a worn chain can lead to expensive damage in components like the cassette and chainring. Here are some signs that your chain may need replacing:
Visible Signs of Damage
As a chain wears, it may start to show physical signs of damage. Look for kinks, rust, or broken links. Visible wear can also manifest as a series of elongations in the chain, which are spots where the chain has stretched over time. If you notice any of these signs, it’s time to consider a replacement.
Furthermore, during your regular inspections, you can use a chain checker tool to measure chain wear. Any elongation beyond 0.5% to 1% indicates that the chain is nearing its limit and should be replaced to avoid further drivetrain damage.
Performance Indicators
Keep an eye on how your bike performs; any irregularities might indicate a problem with the chain. If you start experiencing missed shifts, skipping gears, or excessive noise while pedaling, it could be a sign that the chain is worn and not engaging properly with the cassette. Addressing issues promptly can prevent further wear on the entire drivetrain.
Moreover, pay attention to how your bike engages with its gears. If you’re feeling clunky or sluggish shifts, it’s just as important to assess whether the chain needs replacing, alongside checking the derailleur adjustments. Early detection can save you from a more extensive breakdown that would require additional repairs.
Frequently Asked Questions
Can I install any chain on my electric bike?
No, not every chain can be used on every electric bike. Ensure that you purchase a chain that is compatible with the number of speeds your bike has. Check the manufacturer’s specifications for the right size and type to avoid performance issues. Using an incompatible chain can lead to poor shifting, excessive wear, or even potential component failure.
How often should I replace my electric bike chain?
It varies depending on riding habits and conditions, but a good rule of thumb is to replace your chain every 1,500 to 3,000 miles (or once it shows signs of significant wear). For heavy riders or those who use their bikes for commuting or off-road cycling regularly, earlier replacement may be necessary. Regular inspections will help you gauge when a replacement is due.
What is chain stretch, and why is it a concern?
Chain stretch refers to the elongation of a chain due to the wear of the pins and links over time. As a chain wears, it no longer fits as snugly around the gears, leading to slippage and inefficient energy transfer. This issue can not only affect your bike’s performance but can also accelerate wear on your cassette and chainring, leading to more costly repairs. Regular checks will help prevent extensive chain stretch from causing problems.
Is it necessary to replace the cassette when I change the chain?
While it is not always necessary, replacing the cassette with a new chain is highly recommended, especially if the cassette shows signs of significant wear. If the chain is worn out and you’ve been using it for a long time, your cassette likely has experienced equivalent wear and may not mesh well with a newly installed chain. This mismatch can lead to poor shifting and premature wear of the new chain, negating any benefits you might gain.
Can I change the chain while the bike is on a rack?
Yes, it is possible to change the chain while your bike is on a rack. However, ensure that the bike is stable and secure to avoid unintended accidents. A bike repair stand can provide better access to the components, making it easier to work on. Just make sure that the gears are accessible for both the removal and installation phases of the chain replacement.
Summing It Up
Changing the chain on your electric bike is a manageable but crucial maintenance task that can enhance your riding experience and prolong the life of your bike components. By following the seven steps outlined in this article, you’ve learned how to gather tools, understand compatibility, prepare your bike, remove the old chain, clean components, install the new chain, and test it effectively.
Additionally, regular maintenance practices such as cleaning, lubrication, and being mindful of chain wear will keep your bike performing at its best. By being proactive, you’ll not only save time and money but also enjoy a smoother and more efficient ride. Remember that understanding your bike and its components plays a significant role in maximizing your cycling adventures.
With proper care and attention, your electric bike will serve you well on every journey, allowing you to enjoy the ride as much as the destination.