
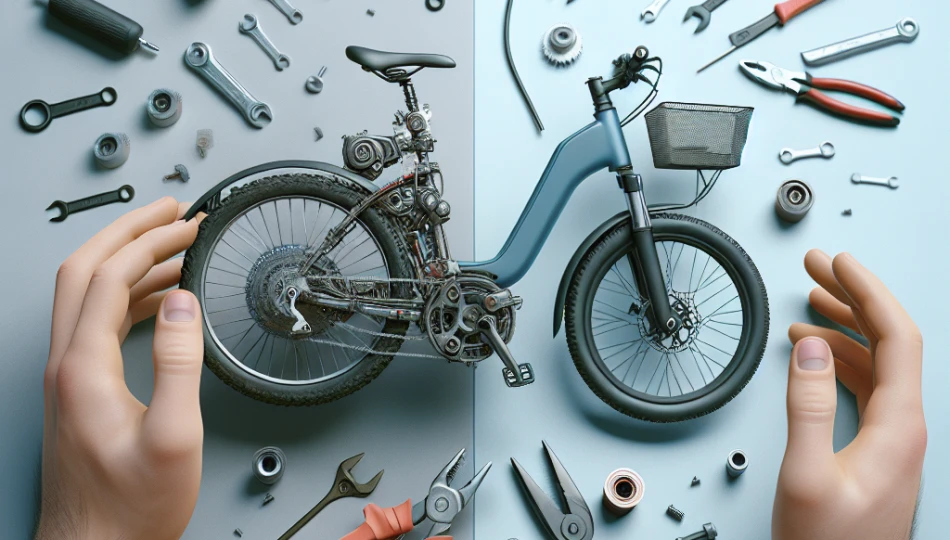
With the rising popularity of electric bikes, many cycling enthusiasts are looking to transform their regular bicycles into electric versions. Not only does this modification allow for comfortable, extended rides, but it can also make commuting and errands significantly easier. In this guide, we’ll explore how to convert a regular bike into an electric bike.
How can you convert a regular bike into an electric bike? You can convert a regular bike into an electric bike by using an electric bike conversion kit, which includes a motor, battery, and necessary components to electrify your existing bike.
1. Choose the Right Conversion Kit
The first step in converting a regular bike into an electric bike is selecting the appropriate conversion kit. There are several types of kits available, each designed for different needs and bike styles. The most common types are:
- Hub Motor Kits: These kits install a motor in the front or rear wheel hub. They are generally easier to install and are perfect for casual cyclists.
- Mid-Drive Motor Kits: These kits are mounted at the bike’s crank, providing better weight distribution and improved performance on hills. They are typically favored by those who want an efficient ride.
- Complete Kits: These include everything you need, from wheels to batteries, designed for specific bike models.
When choosing a kit, consider the following factors:
- Compatibility: Ensure that the kit is compatible with your bike’s frame and components.
- Power Rating: Electric motors range from 250W to 1000W. Select a power rating based on your terrain and purpose. Higher watts can climb steeper hills faster.
- Budget: Prices for electric bike conversion kits can vary widely. Determine how much you’re willing to spend and look for a kit within your budget.
2. Gather Necessary Tools
Before diving into the installation process, it’s essential to gather all the necessary tools. Having the right tools on hand can make the conversion process smoother and more efficient. Here are some tools you will likely need:
- Wrenches: For adjusting bolts and fittings on your bike.
- Screwdrivers: Both flathead and Phillips screwdrivers will be needed for assembling and disassembling parts.
- Multi-tool: A bike multi-tool can help with various adjustments and repairs.
- Wire Cutters and Strippers: If your kit requires wiring, these will be handy for making connections.
- Hex Keys: A set of Allen wrenches will be needed for some component fittings.
Before you start, double-check to ensure that you have all these tools available. If something is missing, it could delay the installation process and create unnecessary frustration.
3. Remove Existing Components
Once you have your conversion kit and tools ready, the next step is to prepare your bike by removing any existing components that will be replaced by the electric kit. Here’s a breakdown of what you’ll need to do:
- Remove the Wheels: Use your tools to detach the wheels, especially if you are installing a hub motor kit.
- Detach the Drivetrain Components: If you’re installing a mid-drive motor, you will need to remove the bike’s chain and possibly the crank set.
- Disconnect Brakes and Cables: Ensure to carefully disconnect any brake and shifting cables to avoid damage.
Make sure to keep all removed parts in a safe place; you may need some of them again during reassembly. Cleaning the bike frame at this stage can also be beneficial, as it prepares the surface for the new components.
4. Install the Motor
The installation of the motor is arguably the most critical step in converting your bike to electric. The process varies depending on whether you’re using a hub motor or mid-drive motor:
- Hub Motor Installation: Begin by inserting the motorized wheel into the bike frame. Ensure it fits snugly and adjust if necessary. Secure the axle with nuts while ensuring everything is aligned correctly.
- Mid-Drive Motor Installation: If installing a mid-drive motor, you’ll mount the motor at the crankset area. Follow the kit instructions carefully as it involves removing the current crank arms and sometimes the bottom bracket.
Pay close attention to motor positioning and alignment as these factors can significantly impact performance. Once the motor is securely attached, plug in any necessary wiring, making sure that connections are secure and protected against moisture. Be methodical and check the instructions thoroughly to avoid any mistakes during this key part of the conversion.
5. Add the Battery and Controller
After successfully installing the motor, the next step involves adding the battery and controller. This section is crucial, as these components manage the power and control how your electric bike performs:
- Battery Placement: Depending on your bike frame and battery type, you can mount the battery on the downtube, rear rack, or within a frame bag. Ensure that the battery is securely attached and doesn’t interfere with your riding.
- Controller Installation: The controller manages the power output to the motor. You’ll typically mount this near the battery for easier wiring. Follow your conversion kit instructions for connecting the controller, ensuring that cables are secured away from moving parts.
It’s also important to check the battery’s ratings and functionality. Make sure to charge the battery fully before you go for a test ride. Additionally, understanding how to correctly connect the battery to the controller is vital as incorrect wiring can lead to performance issues or damage.
6. Set Up the Throttle and Brake Sensors
Once the motor and battery systems are in place, you need to set up the throttle and brake sensors. These components will ensure that your electric bike functions safely and efficiently:
- Throttle Setup: If your conversion kit includes a throttle, you’ll find it mounted on the handlebars. Install it by following the specific instructions provided in your kit and ensure it’s within easy reach for quick access while riding.
- Brake Sensors Installation: Many kits come with automatic cut-off brake sensors that disconnect power when you engage the brakes. These sensors typically attach to the brake levers and should be connected to the controller for optimum safety.
Correctly installing these components can significantly improve the riding experience by enhancing control and providing safety features. Checking the throttle response before heading out is essential to make sure everything functions properly.
7. Perform a Safety Check and Test Ride
After completing the installation, the final step is to perform a thorough safety check before taking your modified bike for a ride. Here’s what you need to do:
- Inspect Wiring: Ensure all wiring is secure and properly insulated to prevent shorts. Look for loose connections and ensure everything is properly fastened.
- Check Brake Functionality: Test the brakes to confirm they are working correctly with the new installation. Ensure that the brake levers feel normal, and there is no significant resistance.
- Test Ride: Take your bike out for a short and controlled test ride. Start off slowly to get accustomed to the new electric components. Monitor how the motor responds under different conditions.
After the test ride, review the performance. Listen for any unusual sounds or issues that need addressing. If everything functions smoothly, congratulations—you have converted your regular bike into an electric bike!
Understanding the Different Types of E-bike Motors
In order to make an informed decision when converting your bike to an electric model, it’s essential to understand the two main types of motors available: hub motors and mid-drive motors. Each has unique characteristics which cater to different riding preferences and environments.
Hub Motors
Hub motors are mounted in the center of one of the bike’s wheels—usually either the front or rear wheel. Their design allows for a simple installation, making them a popular choice for first-time e-bike builders. One of the significant advantages of hub motors is their quiet operation, which can be appealing for urban commuters.
Another advantage of hub motors is that they do not affect the existing bike drivetrain, meaning they don’t require complex installations that can often make the reassembly of your bike complicated. Hub motors provide excellent assistance at low speeds, making them ideal for city riding, where starting and stopping is frequent. However, they tend to struggle more on steep hills or during rugged off-road conditions, making them less suitable for adventurous cycling.
Mid-Drive Motors
Mid-drive motors are mounted near the bike’s crankset and provide power directly to the bike’s chain. This design allows for better weight distribution and performance on inclines, making them a favorite among enthusiast cyclists and those looking for a robust riding experience. One of the key benefits of mid-drive motors is that they utilize the bike’s gears, giving the rider higher flexibility and the ability to climb steep hills more efficiently.
Moreover, mid-drive motors often have a higher efficiency than hub motors, leading to a better range on a single charge, which can make longer rides and commuting more feasible. However, the installation of a mid-drive motor can be more complex, and it places additional stress on the bike’s drivetrain, which may require periodic maintenance or parts replacement.
Battery Types and Their Importance
The type of battery used in your electric bike conversion has a profound impact on performance and range. Understanding battery types can help you make an educated choice that aligns with your riding habits.
Lithium-ion Batteries
Lithium-ion batteries are the most common lightweight batteries used in electric bikes due to their high energy density and longevity. These batteries are capable of holding a significant amount of power relative to their size, enabling longer rides without the need for frequent recharging. One of the main benefits of lithium-ion batteries is their performance under various conditions; they maintain their charge effectively even in cold temperatures, which can be vital for year-round commuting.
Moreover, lithium-ion batteries generally have a longer lifecycle, meaning they can withstand more charge/discharge cycles. Although these batteries tend to be more expensive initially, their durability and efficiency can save money in the long run compared to cheaper alternative batteries.
Lead Acid Batteries
While less common these days, lead acid batteries are another option for e-bike conversions. They are generally heavier and larger, which can lead to a less optimized bike. However, lead acid batteries are more affordable and can be an excellent choice for budget-constrained projects. They are relatively simple to assess and replace, making them suitable for DIY enthusiasts looking for a straightforward conversion. Their weight can be a disadvantage on longer rides or steep terrains, so consider your typical riding conditions before opting for lead acid.
Maintenance and Care for Your New E-Bike
Once your bike conversion is complete, maintaining its electric components is crucial to ensure longevity and consistent performance. Regular maintenance can prevent minor issues from escalating into significant failures that can compromise your riding experience.
Regular Battery Care
To maximize battery life, it’s crucial to follow proper charging practices. Lithium-ion batteries should ideally be charged after each use, avoiding complete discharges whenever possible. It’s also advisable to store your battery in a dry, moderate temperature area when not in use, as extreme temperatures can adversely affect performance and lifespan.
Be mindful of the battery health indicators, which can tell you when it’s time to replace your battery. Many modern batteries come with integrated smart tech that provides diagnostics, showing you essential parameters such as current state of charge, total cycle count, and health status. Keep an eye on these metrics to determine when you may need a replacement to ensure continued optimal cycling.
Motor and Drivetrain Maintenance
Maintaining the motor and bike drivetrain is equally critical. Regularly check for loose connections and signs of wear on moving parts, especially for mid-drive systems that engage the chain. Common maintenance tasks include lubricating the chain, inspecting the gears for wear, and ensuring that all electrical connections are intact and free from corrosion.
For hub motors, inspect the wheel bearings and ensure that they are functioning correctly. If you experience unusual noises or performance issues, addressing them promptly can help prevent more severe problems down the line.
Frequently Asked Questions
1. Is it legal to convert my regular bike into an electric bike?
The legality of electric bike conversions varies by location. In many regions, as long as the converted bike meets specific power and speed regulations (commonly a maximum speed of 28 mph with a 750W motor in the U.S.), it may be street legal. However, check with your local laws to ensure compliance, as regulations can differ significantly between areas.
2. How much should I expect to spend on a conversion kit?
The cost of electricity conversion kits can range widely depending on the type of motor, battery capacity, and included components. Basic hub motor kits start around $300, while mid-drive kits with higher quality motors and batteries can exceed $1,500. It’s essential to assess your budget and desired performance level before making a decision.
3. Will converting to an electric bike make pedaling harder?
Generally, converting a bike to electric does not make pedaling harder. On the contrary, most electric bike systems are designed to assist with pedaling, effectively making it easier. However, if you remove the bike’s gears or misuse the power settings, you may find pedaling can become more difficult. Make sure to understand how to use the electric assist efficiently to enhance your riding experience.
4. How can I ensure my conversion is safe for use?
Safety checks play a major role in electric bike conversions. Ensure that all components are properly secured, that the battery is installed safely away from moisture, and that brakes and wiring are functioning correctly. Additionally, consider wearing a helmet and other protective gear while riding your new electric bike, especially during the initial test rides to assess handling and performance.
5. Can I convert any bike into an electric bike?
While many bikes can be converted into electric bikes, some types are more suitable than others. Bikes with a sturdy frame, a strong wheelset, and sufficient space to accommodate a motor and battery are ideal candidates. Mountain bikes and hybrid bikes usually work best, while lightweight road bikes may pose challenges due to less robustness in frame and components.
6. How often should I check the battery health?
Regular battery checks are essential for ensuring safety and efficiency. Reviewing health indicators provided by the battery every few weeks can help you stay aware of its condition. You should also perform a more thorough inspection at least once every few months to check for signs of corrosion, damage, or performance degradation.
Summing It Up
Converting your regular bike into an electric bike can enhance your cycling experience by providing assistance for longer rides and making commuting significantly easier. By following the steps outlined in this guide—from selecting the right conversion kit and gathering necessary tools to properly installing components and ensuring maintenance—you can successfully electrify your bike.
Understanding the types of motors and batteries will further assist in maximizing performance and durability. Regular maintenance, along with sticking to local laws regarding electric bike use, will ensure a safe and enjoyable riding experience. Whether you seek adventure on trails or a more efficient urban commute, an electric bike conversion can truly elevate your cycling journey.